I can’t believe I’m going to air my dirty laundry here — but up until a few weeks ago my front porch looked like this …
I know, it was pretty embarrassing.
A well-traveled path to the front door had splintered the wood …
A well-traveled path to the front door had splintered the wood …
 |
| Even Ernie the beagle looks embarrassed |
… columns were missing end caps …
… and the bottom post bases were riddled with rot …
In my own defense, I planned to rebuild. That was three years and two estimates ago. Life — and some big ticket expenses that go along with life — kept getting in the way. All the while the porch fell into even greater disrepair.
With limited resources (read: cash) I decided to use caulk and wood filler and paint to try and extend the life of my failing (and ugly) porch.
On day one, I picked up $50 in paint from Home Depot. Then I scraped and sanded the chipped, peeling paint. Using leftover MDF and trim from another project, I fashioned new end caps for the bottom posts with my miter box …
… and attached with Gorilla glue, using painter’s tape to hold it all together while it dried:
I found some cheap laminate trim at the local hardware store to use to cover up the rotting bottom posts. I cut with my miter box, affixed with Gorilla glue, and slathered with spackle …
I finished the day with caulk, caulk, and more caulk.On day two, I sanded the caulked areas, wiped clean, and then primed with Zinsser 1-2-3 …
Days three and four involved lots of painter’s tape, patience, and a not so steady hand (hence the need for the painter’s tape) …
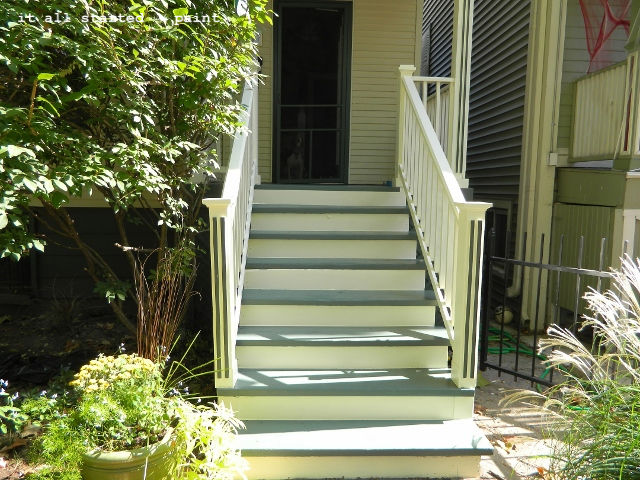
At the end of the day four, the tape was pulled and I no longer had to hold my head in shame …
 |
| Look closely and you’ll see that even Ernie now holds his head high with pride |
… and here’s the porch all dressed up for fall …
When all was said and done, I’m pretty sure I heard my neighbors breathe a collective sigh of relief.
Update:If you want to see how I put those numbers on the steps, click here ...
… and to find out more about the rug I painted directly onto the front porch landing, click here ...
And now I’ll be spreading my dirty laundry across the blogosphere by linking up to …


Beautiful! What a transformation! What did you do with your Fallout Shelter sign? 🙂
Porch looks great! Love your page!
what a transformation!! great job…and great pictures!!
Oh this is SO great! I have to say though, having lived for a few years in and old house and wishing I could again, I thought your before was charming 🙂 That said, this is an impressive transformation and what you used to make it is even more impressive! Looks lovey!
Soo darling~ love the numbers! I host a link party at my blog on the weekends if you would like to come share sometime! 🙂
Just amazing what paint, time and good old fashion ingenuity can accomplish. Fantastic!
~Pam
pamspaintparlor.typepad.com
They look fantastic!
Sue
xo
This looking really good.I like this one.
Did you use a solid stain on your porch? What kind of paint?
Andi, I hope this reaches you. You came through as a “no-reply” comment. I used Benjamin Moore porch paint. No stain was involved.
🙂
Linda
Beautiful and great job!
Greetings! I clicked over to this old post, from your newer post from Met Monday — I, too, have a porch that needs work and I am so impressed with all of your hard work here! Good for you, it all looks fantastic! You did a wonderful job.
Best,
Gloria